Testing Notifications
Now it's the moment of Magic, we are ready for our first test.
There are 3 different kinds of Message styles that can be sent from the Testing panel on the right-hand side of the assistant.
These tests are designed to be as quick and easy as possible, with some default messages and values. Just pick the Channel you are testing with and Send away.
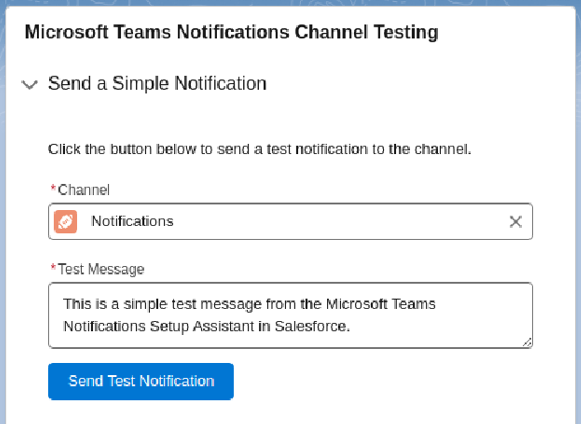
Test a Simple Notification
From the Teams Configuration page in Salesforce, use the Notifications Channel Testing section on the right hand side.
- Select a Teams Channel to send the notification into by typing its name.
- Adjust the Test Message if desired.
- Click Send Test Notification.
- Wait for the Confirmation Message under the button.
For additional customization, visit our Send a Simple Notification page.

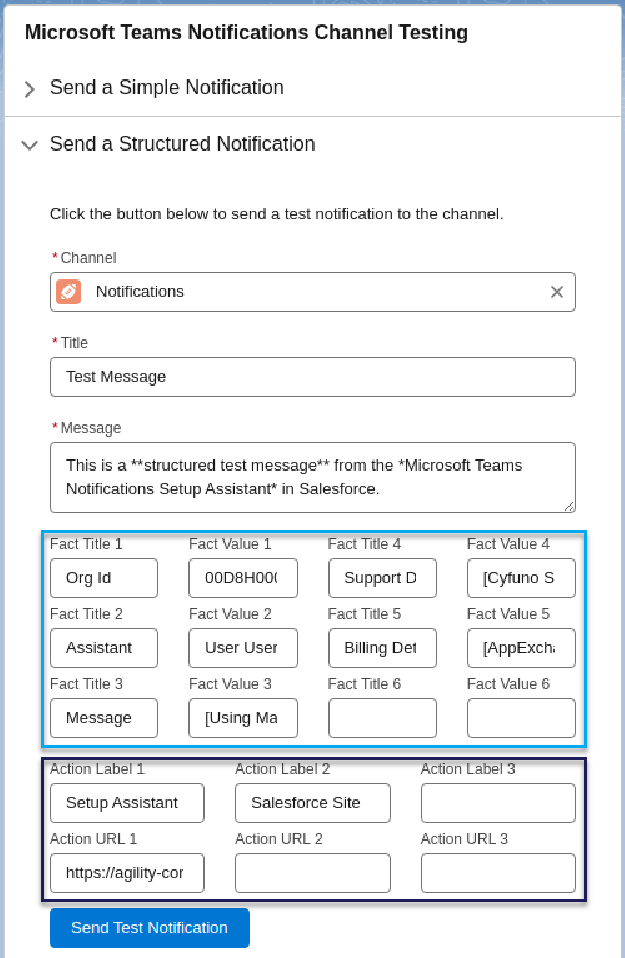
Test a Structured Notification
From the Teams Configuration page in Salesforce, use the Notifications Channel Testing section on the right hand side.
- Open the "Send a Structured Notification" area.
- Select a Teams Channel to send the notification into by typing its name.
- Adjust the Test Title and Message if desired.
- Change / Remove Fact Titles and Values in Pairs. (highlighted by light-blue box)
- Change / Remove Action Labels and URLs in Pairs. (dark-blue box)
- Click Send Test Notification.
- Wait for the Confirmation Message under the button.
For additional customization, visit our Send a Structured Notification page.

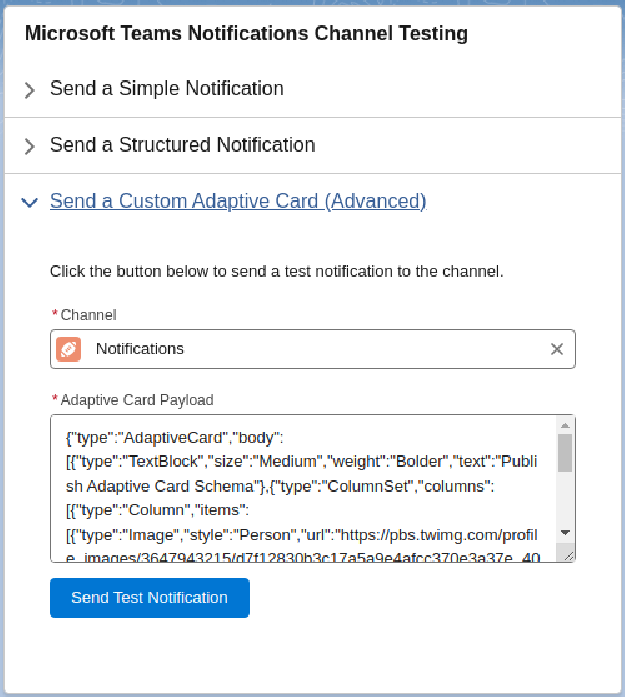
Test an Advanced Notification
From the Teams Configuration page in Salesforce, use the Notifications Channel Testing section on the right hand side.
- Open the "Send a Custom Adaptive Card" area.
- Select a Teams Channel to send the notification into by typing its name.
- Use the existing Adaptive Card Payload, or create your own by going to Microsoft's Adaptive Card Designer and copying the card payload.
- Click Send Test Notification.
- Wait for the Confirmation Message under the button.
For additional customization, visit our Send an Advanced Notification page.

Next Step: Assigning Permissions
