Create Salesforce Site
A Salesforce Site is needed to allow Microsoft Teams to send Salesforce some key events, such as our Bot being registered in a particular Team.
Instructions and values you can use are provided in the Assistant in the middle column.
As the Site is configured, you will notice bullet points appear on the left showing you what pieces are not yet complete. This section refreshes automatically every few seconds to give you an up-to-date view of the installation.
Register Site's Domain
This only needs to be done once per Salesforce Org, and if you have already registered your site's domain, you can move on to Create the Site.
Permissions Needed: Customize Application. Salesforce Docs
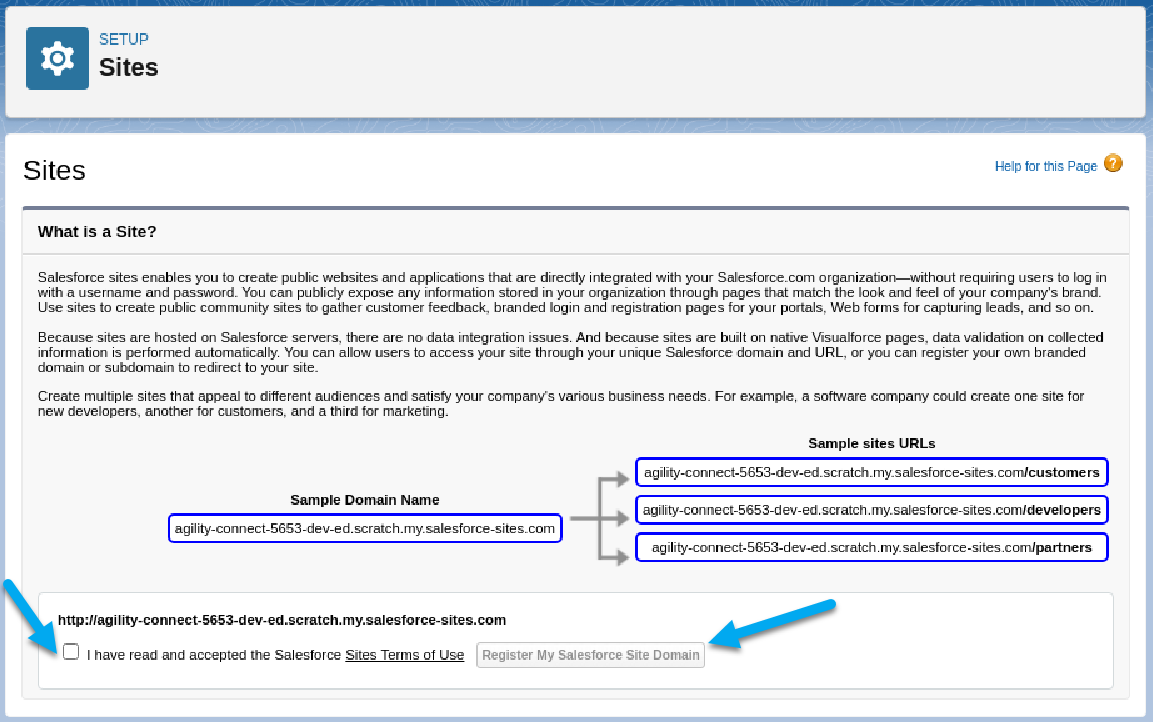
- From Salesforce Setup, navigate to Sites using either Quick Find or User Interface > Sites and Domain > Sites.
- Read and Accept the Salesforce Sites Terms of Use.
- Click on the button to "Register My Salesforce Site Domain".
- Confirm that the domain you are registering is the one you want. This cannot be changed after-the-fact, so be double sure!
- Wait for Salesforce to do things in the Background.

Create the Site
This only needs to be done once per Salesforce Org, and if you have already created a Site you can move on to Editing Public Access Settings.
Permissions Needed: Customize Application, Manage Users. Salesforce Docs
- From Salesforce Setup, navigate to Sites using either Quick Find or User Interface > Sites and Domain > Sites
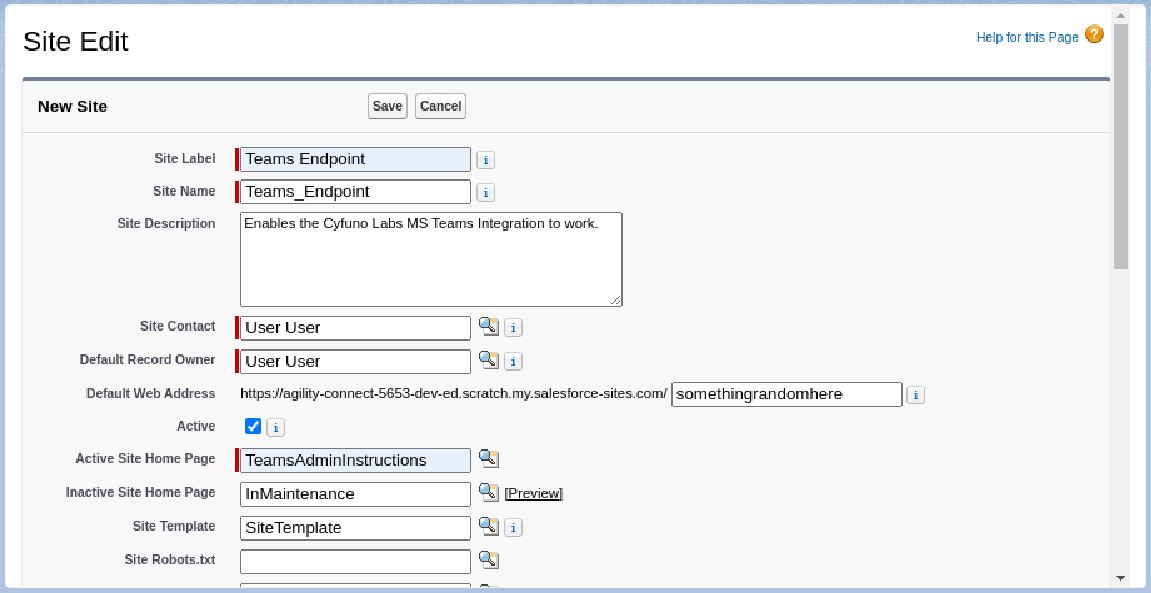
- Create a new Site, filling in a few specific values:
- Site Label: Teams Endpoint
- Site Name: Teams_Endpoint
- Site Description (optional): Enables the Cyfuno Labs MS Teams Integration to work.
- Active: Checked
- Active Site Home Page: TeamsAdminInstructions
- Click Save. It's likely the page may appear to do nothing. Just give it some time and Salesforce will let you know when it was successful.

Edit Public Access Settings
Next, edit the Public Access Settings of the Site.
- From the Site that was just created, click the Public Access Settings button.

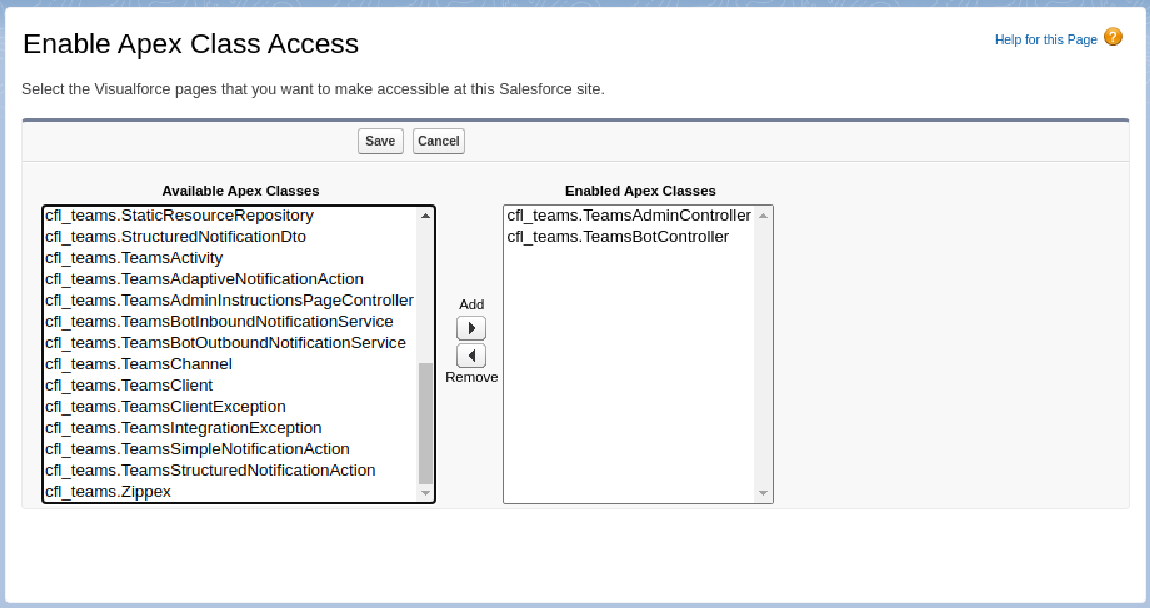
Looking at the Site's Guest User Profile, we want to enable Apex Class access to 2 Classes.
- Click on Enabled Apex Class Access, then click Edit.
- Add cfl_teams.TeamsAdminController.
- Add cfl_teams.TeamsBotController.
- Click Save.
Again looking at the Site's Guest User Profile, we want to give access to 2 site Objects.
- Click on Edit to Edit the Profile.
- For the Custom Object "Teams Bots", click Create.
- For the Platform Event "Teams Bot Inbound Notification", click Create.
- Scroll to the bottom of the page, click Save.
Next up: Creating the Bot in Microsoft Teams


