Salesforce Case Example
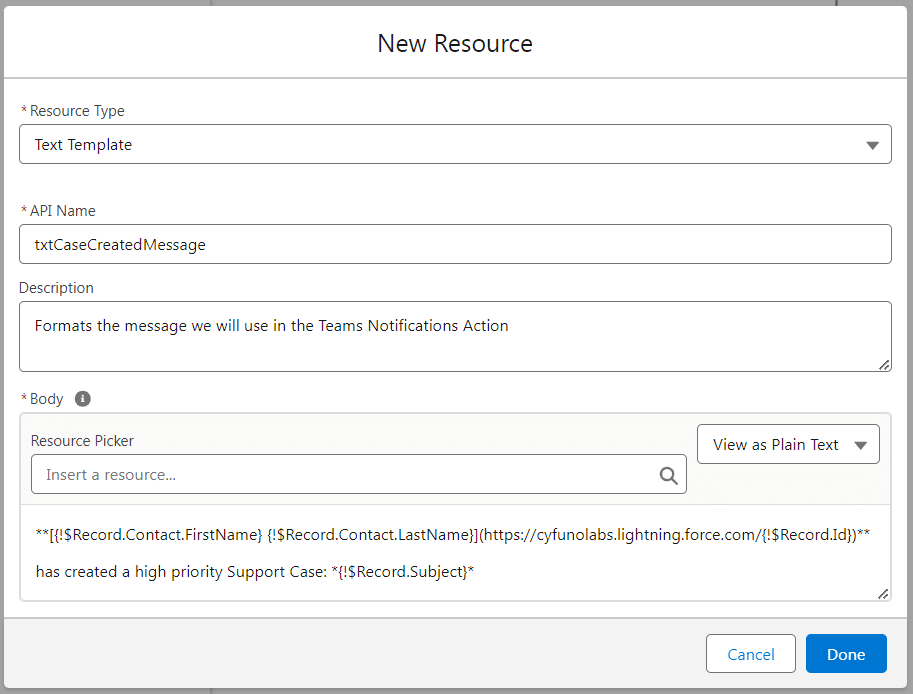
Make Text Templates
A Text Template is a great way to prepare a formatted message, especially if we want to construct a piece of text using values from other resources such as Records and other variables.
- From Salesforce Setup, navigate to Flows using either Quick Find or Process Automation > Flows. Create or Edit a Flow.
- Open the Toolbox on the left-hand side of the screen, click New Resource.
- Resource Type: Text Template
- API Name: give it a descriptive name.
- Description: describe what the message will be when "assembled"
- Body: View as Plain Text, then assemble the message.
Read more about Markdown options available.
**[{!$Record.Contact.FirstName} {!$Record.Contact.LastName}](%%ORG_URL%%/{!$Record.Id})** has created a high priority Support Case: *{!$Record.Subject}*
Add Action to Flow
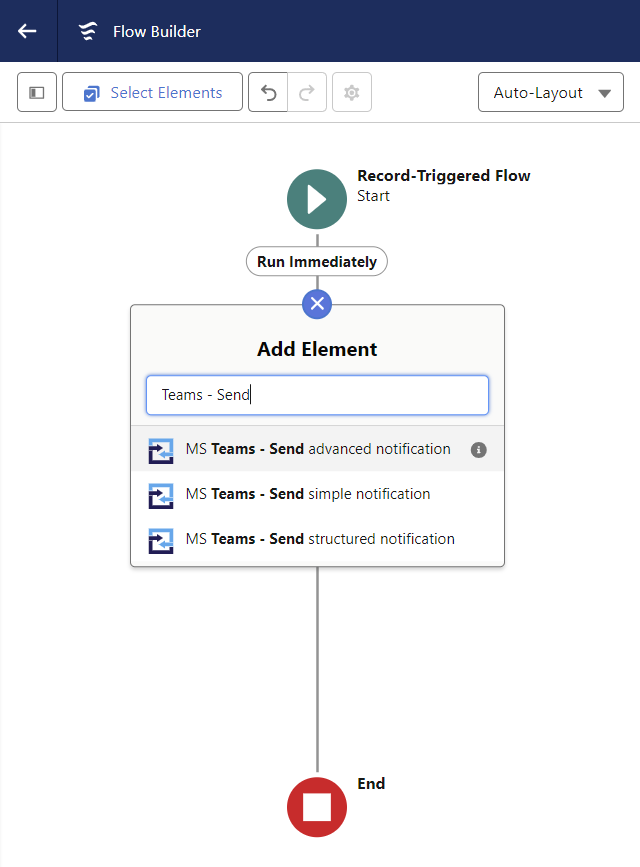
Determine where in your Flow the Notification should be sent, and then add a new Element.
- Search for Teams to quickly narrow the list.
- Pick one of the 3 Teams Actions. For our example we will go with a Structured Notification.
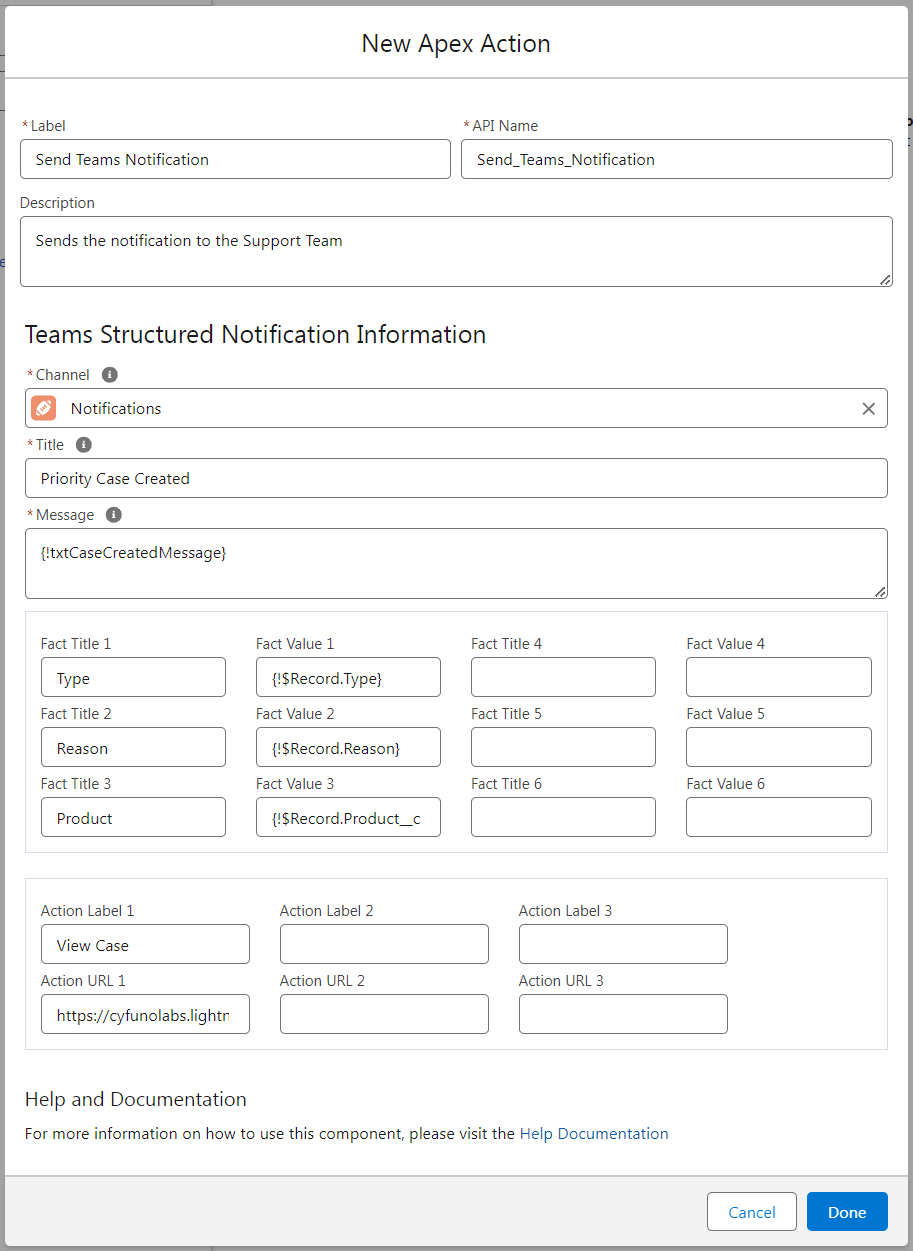
- Label: Often best to specify who is getting the notification.
- API Name: Let it autofill
- Description: Tell your future self with a terrible memory why this notification is being sent
Configure the Message
The rest of the values are for the notification itself.
Populate them as needed. As a starting point, we've included some values below.
- Title: Priority Case Created
- Message: {!txtCaseCreatedMessage}
Facts aren't required, and you can populate any combination. They end up being displayed in a table within the notification. The first 3 are the first column of key-value pairs, with the last 3 being the second column.
Note: you can use Text Template variables if things start getting crazy.
- Fact Title 1: Type
- Fact Value 1: {!$Record.Type}
- Fact Title 2: Reason
- Fact Value 2: {!$Record.Reason}
- Fact Title 3: Product
- Fact Value 3: {!$Record.Product__c}
Actions are Link Buttons that appear at the bottom of the notification, ideal for taking the user to records either within Salesforce or another platform.
- Action Label 1: View Case
- Action URL 1: %%ORG_URL%%/{!$Record.Id}
With everything populated, time to Save and Test!


